I am chronically late.  So, in order to get the little one off to swim class with a full belly I looked for healthy and nutritious muffin recipes to make for an easy breakfast.  This recipe for Banana Wheat Bran Muffins from the Weelicious website is great as a grab & go breakfast for on the road to school or work.  I make mine in mini muffin pans so they are toddler sized.  Make sure to use super ripe bananas and you’ll get some naturally sweet and moist muffins!

Banana Wheat Germ Muffins

Ingredients:

1 Cup All Purpose Flour
1 Cup Wheat Germ
1 Tsp Baking Soda
1/2 Tsp Baking Powder
1 Tsp Salt
3 Medium Very Ripe Bananas, mashed, plus 1 banana sliced approx. 3/4 inch thick for topping
1/2 Cup Agave
3 Tbsp Vegetable Oil
1 Tbsp Vanilla
1 Large Egg

Directions:

1. Preheat oven to 350 degrees.
2. Combine flour, wheat germ, baking powder, baking soda, salt in a bowl.
3. In a standing mixer combine the 3 bananas, agave, oil, vanilla and egg. Beat until combined and bananas are mashed.
4. Gently mix in the dry ingredients in 3 stages until just combined. Do not over-mix.
5. Grease or line muffin cups or mini loaf pans and fill 3/4 full with the mixture.
6. Place the slices of banana on top of each filled muffin cup or decoratively over the loaf pan.
7. Bake 15 minutes for mini muffin cups, 20 for regular muffin cups or 25 minutes for mini loaf pans or until a toothpick comes out clean.
8. Cool and serve.

When the weather turns a bit cooler I love to make more comforting foods.  What could be more comforting than the smell of fresh baked bread?  Having never attempted to make fresh bread (even in a bread maker) I cruised around the internet for a simple bread recipe.  I found a recipe for “Fabulous Homemade Bread” and tweaked it a little bit.  You could easily add wheat bran or wheat germ for more fiber; I’m going to keep experimenting with it – but this an easy & yummy recipe for a basic sandwich like bread.
Enjoy!

Yields 2 loaves

Ingredients

  • 3 Tablespoons warm water
  • 1 (.25 ounce) package active dry yeast
  • 1 1/2 Tablespoon bread flour
  • 1 teaspoon white sugar
  • 2/3 cup quick cooking oats
  • 2/3 cup whole wheat flour
  • 1 1/2 cups warm water

Directions

  1. Preheat oven to 350 degrees.
  2. In the mixing bowl of an electric mixer, stir together 3 Tbsp warm water, 1 teaspoon sugar, 1 1/2 Tbsp bread flour, and yeast. Let grow for about 5 minutes. It will bubble almost immediately.
  3. Measure oats, wheat flour, salt and honey into a seperate bowl. Add 1 1/2 cups warm water and the oil. Mix into grown sponge on low speed with a dough hook for 1 to 2 minutes. Increase speed slightly, and begin adding bread flour 1/2 to 3/4 cup at a time until dough pulls away from sides of bowl. Humidity determines how much flour you need before the bread pulls away from the edge of the bowl. It is normal for the dough to be sticky.
  4. Place dough in an oiled bowl, and turn to coat the surface. Cover with a damp cloth. Let rise in a warm spot for 1 hour, or until doubled in size.
  5. Divide dough into 2 pieces. Shape loaves, and place in greased 8 x 4 inch with bottom lined with parchment paper. Let rise until dough is 1 inch above rim of pans, usually 1 hour.
  6. Bake at 350 degrees F ( 175 degrees C) for 35 minutes, or until tops are browned. Let cool in pans for 10 minutes, and then turn out onto wire racks to cool completely.
 Ever wonder what the difference between all purpose flour, cake flour & bread flour is?  Here is an explanation of the different types of flour.

I’m short on time.  Between working on two businesses and chasing my toddler around; making an amazing dinner has become more and more of a chore.  That being said, I am always on the lookout for recipes that are low on prep time, don’t need a lot of fussing over, are healthy, don’t come straight out of a box, and are delicious. Sounds like a tall order doesn’t it?  I’m promising to post whatever I find out there for anyone who is looking for the same.

The first recipe I’d like to share is “Brown Bag Chicken”.  The chicken literally roasts in a brown grocery bag!  The result is a super moist chicken and is no fuss and amazingly easy.  There is no need to add any oil or butter, and you don’t even have to truss it – just throw it in the bag and tie it up!

Brown Bag Chicken (adapted from Sara Foster’s Southern Kitchen)

Ingredients

  • 1 (3- to 3 1/2-pound) chicken
  • Sea salt and freshly ground black pepper
  • 1/2 onion
  • 3 garlic cloves
  • 4 sprigs fresh rosemary or 2 tsp. dry bouquet garni or 2 tsp dry italian seasoning
  • 1 tablespoon ground hot Hungarian paprika
  • 1 tsp granulated garlic

Directions

  1. Preheat oven to 400 degrees.
  2. Rinse chicken, pat dry, and remove any excess fat. Generously season chicken inside and out with salt and pepper. Place onion and rosemary (or your choice of dry seasoning) inside cavity; rub skin with paprika & granulated garlic, place garlic cloves under chicken skin.Lay a standard-side brown paper grocery bag on its side; place chicken inside bag and tie bag with kitchen twine to enclose. Place bagged chicken on a rimmed baking sheet; transfer to lower third of oven, making sure there is plenty of room between the bag and the top of the oven. Roast chicken for 1 1/2 hours.
  3. Remove chicken from oven and carefully open bag to release steam. An instant-read thermometer inserted into the thickest part of the thigh should reach 165 degrees and juices should run clear when thigh is pierced with the tip of a sharp knife. Let stand for 10 minutes before carving; serve warm.

We never had dessert in my house growing up, so I never really had much of a sweet tooth.  Lately though, I’ve been  jonesing for something sweet after dinner.  I don’t have the appetite for something big; just a taste of something to quell the craving.

My husband has been bringing home dark chocolate bars lately, and I’ll have a square or two just to calm the urge for something sweet.  Some of them have been bitter, some a little waxy…but I think I’ve found one that is just right.  It’s sweet, a tad bit salty, and sigh…just what I need to scratch that sweet craving itch.  That scratch comes in the form of the Lindt Excellence “A Touch of Sea Salt” Dark Chocolate Bar.  Smooth and delicious dark chocolate seasoned with fleur de del sea salt crystals…Get it!

If you are short on time or energy there is nothing like a one pot meal for dinner.  Even better, they are often great recipes to double and freeze.  I’m taking on a new project so my free time is at an even greater minimum, and I was searching the Food Network website for some ideas.  I came across a simple recipe from Giada De Laurentis that only calls for one pot and no extraordinary ingredients.  I omitted a couple of the ingredients from the original recipe, but will post a link to the original recipe at the end.

Chicken Stew

Ingredients

  • 2 tablespoons olive oil
  • 2 stalks celery, cut into bite-size pieces
  • 1 carrot, peeled, cut into bite-size pieces
  • 1 small onion, chopped
  • Salt and freshly ground black pepper
  • 1 (14 1/2-ounce) can chopped tomatoes
  • 1 (14-ounce) can low-salt chicken broth
  • 1/2 cup fresh Basil leaves, torn into pieces
  • 1 tablespoon tomato paste
  • 1 bay leaf
  • 1/2 teaspoon dried thyme leaves
  • 1/2 teaspoon red pepper flakes (optional)
  • 2 skinless chicken breasts with ribs (about 1 1/2 pounds total)

Directions

Heat the oil in a heavy 5 1/2-quart saucepan over medium heat. Add the celery, carrot, and onion. Saute the vegetables until the onion is translucent, about 5 minutes. Season with salt and pepper, to taste. Stir in the tomatoes with their juices, chicken broth, basil, tomato paste, bay leaf, thyme and red pepper flakes if you want a little spice. Add the chicken breasts; press to submerge.

Bring the cooking liquid to a simmer. Reduce the heat to medium-low and simmer gently uncovered until the chicken is almost cooked through, turning the chicken breasts over and stirring the mixture occasionally, about 35 minutes. Using tongs, transfer the chicken breasts to a work surface and cool for 5 minutes. Discard the bay leaf. Simmer until the liquid has reduced into a stew consistency, about 10 minutes.

Discard bones from the chicken breasts. Shred or cut the chicken into bite- size pieces. Return the chicken meat to the stew. Bring the stew just to a simmer. Season with salt and pepper, to taste.

This is a versatile, and it would be easy to make variations.  For example, you could omit the basil and add cumin, coriander and fresh corn for a Southwestern spin on it.

Here is the link to the original recipe:

http://www.foodnetwork.com/recipes/giada-de-laurentiis/chicken-stew-recipe/index.html

This year we celebrated baby’s first Christmas. You can make yourself go crazy trying to make Christmas perfect for your little one with millions of presents, a visit to Santa, and creating new traditions you hope to celebrate as a family. As Thanksgiving came to a close, I was determined to create a picaresque Christmas for my 11 month old complete with what would be our family traditions going forward.

I wanted an advent calendar that we would use every year, but could not find the perfect one. I felt defeated as December 1st rolled around and I hadn’t found “the one”. Taking Addison to the Irvine Christmas train was also high on my list….but with so much rain on the weekends this year we didn’t make it. Hitting the shops early or buying all my gifts online was also a part of my plan – but guess what…didn’t happen.

Baby’s 1st Christmas wasn’t ruined, however, because somewhere along the way I lowered my expectations and we were able to start enjoying the holiday. Instead of the long list of to do’s, a much shorter and realistic set of goals was  set.

One was getting an ornament at Roger’s Gardens to commemorate her 1st Christmas. Roger’s Gardens in Newport Beach has an amazing Christmas display with gorgeous decked out trees. They also have a Santa who poses with the kiddos for free…we didn’t know this ahead of time, just stumbled upon it; but picking out an ornament each year and posing with Santa is bound to be a Christmas tradition.

We discovered the Elf on a Shelf , and although our little one is too young to understand the concept we can’t wait to read her the story and bring out the elf every year to report back to Santa.

I scaled back my Christmas cookie bake-a-thon to just a couple of different kinds, and that was enough. I made rugulach again this year (will post the recipe soon) and some chocolate and pecan biscotti. I can’t wait until our little girl is old enough to enjoy making Christmas cookies with me (and maybe help me clean up).

In the end, it was all enough. I learned that traditions aren’t made in one swoop; they evolve over time and should not be forced. Everyone is happy and healthy and that made Christmas perfect.

I’d love to hear about some of your Christmas traditions, especially any unusual ones!

For Thanksgiving this year, we are headed to my in-laws house in the Bay Area. This has been a banner year for babies in the family, and thus a big group is descending to take part in the Thanksgiving gluttony as well as meet and greet the new additions.

A sign up list was sent out for side dishes, desserts etc. Usually, I am really excited to showcase one of my culinary creations, but I have to admit it…I copped out. I signed up for rolls. (I can hear my friends saying “WHAT?! I can’t believe YOU signed up for rolls…” Yes, I know I know…but we are driving up on Wednesday and I don’t want to make any promises I can’t deliver!) And just a few minutes after I sent out the email signing up for rolls, I got a response from my husband’s cousin, Richard via email saying he was certain I would have been making my “famous scalloped potatoes” and if I wasn’t going to make them could he please have the recipe to have a go at it. Needless to say, I had no idea that they were in any way famous and I am hugely pleased and honored they have been given such status.

Truth be told my famous scalloped potatoes are adapted from a recipe by Emeril Lagasse
used on the menu at his Delmonico Steakhouse. Ridiculously rich, they are crisp on top and ooze with yummy cheese. So Richard, just in case I don’t get around to making them this year…here is the recipe. Enjoy!

Marita’s Famous Scalloped Potatoes
makes 6 servings

4 cups half & half (or 2% milk for a reduced calorie version)
2 garlic cloves, peeled and smashed
2 tsps. salt
1 tsp freshly ground black pepper
3 lbs Russet Potatoes, peeled & cut into 1/4 inch slices
8 oz good quality Swiss cheese, grated ( you can also do a mix of white cheddar and swiss for a milder flavor)

Instructions:
1. Preheat the oven to 400 degrees F. Lightly grease a 2 quart baking dish with vegetable oil.

2. Bring half & half (or milk) and garlic cloves to a simmer in a large saute pan over medium-high heat, take care to not scald the half & half. Add salt & pepper and stir well. Add potatoes adding more half & half as necessary to just cover them. Lower the heat to medium -low and simmer until the potatoes are barely fork tender, approx. 10 minutes. Flip potatoes carefully with a spatula or slotted spoon so that all the potatoes are cooked uniformly.

3. Transfer a third of the potatoes with some of the cream to the prepared baking dish, and layer a third of the cheese, alternate until ending with cheese on top.

4. Place the dish on a baking sheet and roast in the oven until golden brown on top, about 30 minutes. Remove from the oven and set aside for 5 minutes before serving nice and hot!

Green with Apple

I embarked on the first day of my 3 Day Juice Cleanse hopeful I would be able to tolerate the lack of solid food until Thursday morning and be able to stomach the dreaded green juices which contain vegetables like kale.  I’m not a stranger to juicing fruits and vegetables, but my repertoire has been limited to apples, carrots, citrus, ginger – pretty easy stuff.   The prospect of drinking green sludge was off-putting, but Food & Wine Magazine’s declaration that the  BluePrintCleanse is the “Foodie’s Cleanse” sounded promising.

The BluePrintCleanse offers 3 levels of cleanses: Renovation, Foundation, & Excavation.  Going against my all or nothing nature, I opted to ease into detoxing and chose the level 1 Renovation cleanse.  The beginner cleanse consists of 2 green juices, 3 fruit juices and 1 nut milk.

Menu for Day 1

Warm water with lemon

Carrot, apple spinach, parsley  x’s 2 (not a BluePrintCleanse Recipe)

Blueberry, apple, vanilla

Carrot, apple, ginger

Greens with apple (kale, cucumber, spinach, parsley, lemon & apple)

Raw chocolate milk

The verdict on the taste?  DELICIOUS!  The  green juice I was so afraid of is amazing.  The Greens with Apple Juice  tasted clean and fresh; something I would drink even if I wasn’t on the cleanse!  The Blueberry Apple Vanilla is a smoothie and very satiating, it was perfect for mid-day when my mind started to wander towards burgers and fries.  I was hesitant to try the Raw Chocolate Milk because the base  for this recipe is soaked raw cashews (and I hate cashews).   Didn’t taste like cashews to me…thank goodness!  I was like a dessert.  Although sweet and delicious, my only complaint is the concoction seemed a bit gritty.

I expected to be ravenous while doing the 3 Day Cleanse, especially on the first day.  Surprisingly, I wasn’t dying of hunger.  Don’t get me wrong at around 1 pm and 4 pm I experienced cravings and fleeting moments of hunger, but it wasn’t like I wanted to kill for a bite of something.

I went to bed feeling I had accomplished something!  I exercised my willpower, drank some delicious concoctions, and wasn’t going to bed feeling bloated or starving.  2 more days?  Bring it on!

Click here for more info on: The 3-Day Cleanse: Drink Fresh Juice, Eat Real Food, and Get Back into Your Skinny Jeans

Baby A started eating solid foods last week. We started with an organic brown rice cereal by HAPPY BELLIES , which contains probiotics and DHA.  I bought a wonderful baby food cookbook called The Petit Appetit Cookbook, and have started making purees from organic fruit.  I am deeply concerned about what passes baby’s lips and into her belly; doing research to find the healthiest options.

But what about what passes my lips?  Those starchy garlic fries certainly were tasty enough to make me smack my lips and lick my fingers…and what about that creamy brie?  Good God! that steak and glass of Pinot Noir were deeelish! But I’ve stopped losing the baby weight, I’m swollen, and generally don’t feel tip top.  What I am trying to say is I spend a lot of time worrying about my baby’s health and nutrition and it has inspired me to take a hard look at my health and what I put into my body .

I recently stopped breastfeeding and no longer have excuses to indulge in the extra calorie intake (Cupcake?  That’s okay, I’m breastfeeding… I’ll burn it off !  C’mon you know you’ve had this inner dialogue).   I’ve decided a 3 day juice cleanse is just the ticket to rebooting my tired, bloated, and creaky body.

I’ve been poking around online for a few weeks and found several companies that will overnight their organic pre-made juice to you….but at the tune of $260 I abandoned the shopping cart.  I found a company that also sells DIY book if you were unable to order their juices.  Touted as the “Juice Cleanse for Foodies”, the BluePrintCleanse certainly piqued my interest.  If I can do this cleanse without gagging on sludge, that is what I want to do!

3 Day Cleanse by BluePrintCleanse Founders Zoe Sakoutis & Erica Huss

The 3 Day Cleanse promises amazing benefits, “…you will understand the difference between feeling full and feeling nourished. You’ll weigh less, brim with more energy, and look and feel sexier!”  Damn, if I can have those things after having a baby sign me up!  I’m not only doing this to lose the excess baggage post baby, but for other health reasons.  According to studies sited in the book periodic fasting has amazing health benefits including, decreased inflammation of tissue  and greater mental clarity;  and long term, a decreased likelihood of heart disease and type 2 diabetes.  It is recommended to do a 3 day cleanse once a month or even a 1 day cleanse after an evening of overindulgence.

What I like about this cleanse is that it doesn’t appear to be overly strict, setting me up for feelings of disappointment or failure if I don’t follow the program to a T.  I hope this 3 Day Cleanse is as delicious and satiating as it claims so I can stick to it!  More on my progress later!

Summer is here and the June gloom has finally burned off! Weather like this makes me crave really light and fresh flavors. But…my tolerance for staying in a hot kitchen and cleaning up after a tiring day of work & baby is low. You may think I am going to say – Take it outdoors and grill! I have an even simpler idea – cooking en papillote.

Sounds fancy doesn’t it? En papillote is a French term for cooking in parchment paper. It’s very easy, with minimal clean up and super healthy! Sometimes I do a complete meal – halibut & veggies for example or sometimes when I need a side dish and I am feeling lazy I’ll just do veggies this way.

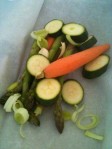
Veggies in parchment

Veggies in parchment

Here is my recipe for cooking halibut en papillote (adapted from Martha Stewart):

  • 8 asparagus spears, cut in half
  • red & yellow bell peppers, cut into strips
  • 1 clove garlic, finely chopped
  • 2 handfuls of baby spinach, well washed
  • 1 medium leek whites only, thinly sliced
  • 1 lemon, thinly sliced
  • olive oil
  • fresh thyme
  • 2 6-ounce halibut fillets, about 1 1/2 inches thick
  • salt and freshly ground pepper
  • freshly chopped parsley
  1. Preheat oven to 400 degrees. Using two 12-by-17-inch sheets parchment paper, fold each sheet in half crosswise.
  2. Place 1 sheet of parchment flat on a work surface. Place half of the asparagus, garlic, spinach, leeks, peppers and 2 lemon slices on one side of the crease; season with salt and pepper. Place halibut on top of veggies, season with salt, pepper and thyme top with another lemon slice and drizzle about 2 tsp. of olive oil.   Fold parchment over ingredients. Make small overlapping folds along the edge to seal.
  3. Place packets on a baking sheet. Bake until packets have puffed, and fish is cooked through, about 15 minutes. Transfer packets to individual plates. Serve immediately, opening packets at the table. Garnish with any remaining lemon slices & parsley.

Veggies wrapped up and ready to go!

You can use any combination of veggies….summer squash, baby carrots, shallots, fresh peas the possibilities are endless!  You do want to make sure that veggies will cook uniformly so keep that in mind when you choose & cut your veggies.

Enter your email address to subscribe to this blog and receive notifications of new posts by email.

Join 1 other subscriber